


How To Tighten Your Security In Microsoft Edge
Those of you who use Microsoft Edge want to make sure that your security is as tight as possible.Edge offers several options to help protect you from malicious websites and other online hazards.
A SmartScreen option will protect you from malicious websites and files. An option for potentially unwanted apps blocks downloads of suspicious or low-reputation apps.
A typosquatting checker warns you if you’ve mistyped a URL, potentially leading you to a malicious site, and an enhanced security option allows you to choose a specific security mode to defend your browser from malware.
To access the security options: Click the ellipsis icon in the upper right > Select Settings > then click the setting for Privacy, search, and services > Scroll down until you see the section for Security.
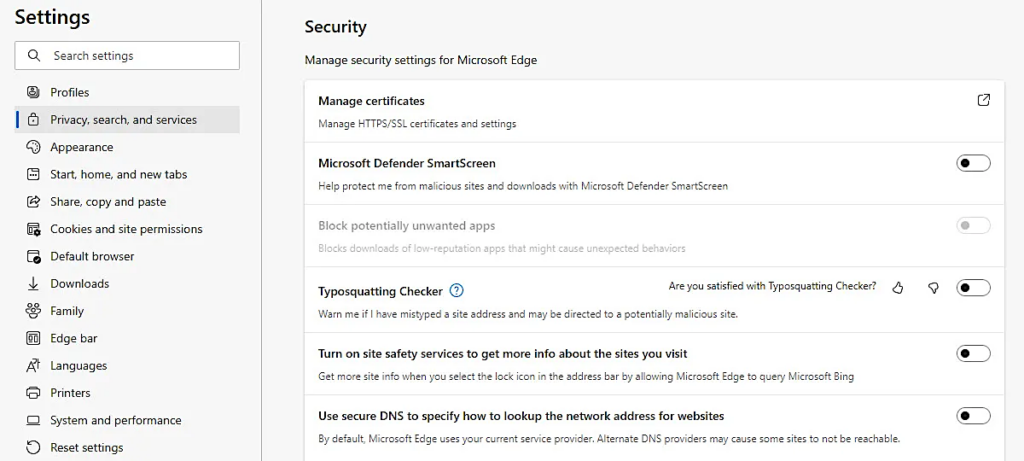
Security Options In Microsoft Edge
1. Switch On Microsoft Defender SmartScreen
The Microsoft Defender SmartScreen tries to protect you from malicious sites and downloads. In general, this is a helpful feature as it will automatically stop the loading of sites and files deemed malicious or suspicious.
SmartScreen does sometimes get in your way with too many false positives, an annoyance when you’re trying to download a file that you know is legitimate.
However, I’d advise you to turn on the switch for this one. If you do bump into too many false positives, you can always turn it off, at least temporarily.
2. Block Potentially Unwanted Apps
The Block potentially unwanted apps automatically stops downloads of potentially unwanted applications (PUAs) that may slow down your system, display unwanted ads, or try to install additional software.
The apps blocked by this option aren’t typically malicious but more annoying and disruptive. Like SmartScreen, this one does occasionally result in a false positive, but you’re better off keeping it enabled and then disable it if you need to get past any false positives.
3. Enable Typosquatting Checker
The Typosquatting Checker warns you if you’ve mistyped a URL and get redirected to a potentially malicious website.
In a practice known as typosquatting, cybercriminals will set up malicious websites that mimic the URLs of legitimate sites with certain characters added, deleted, or changed.
Enable this option, and the typosquatting checker will alert you if you try to access one of these sites.
4. Turn On Site Safety Services
The Turn on site safety services to get more info about the sites you visit provides details about your current site if you click the Lock icon in the address bar.
Revealing such information as the security of the connection, the number of cookies in use, and the number of trackers blocked, this option is useful for legitimate and suspicious sites alike, so you’ll want to enable this.
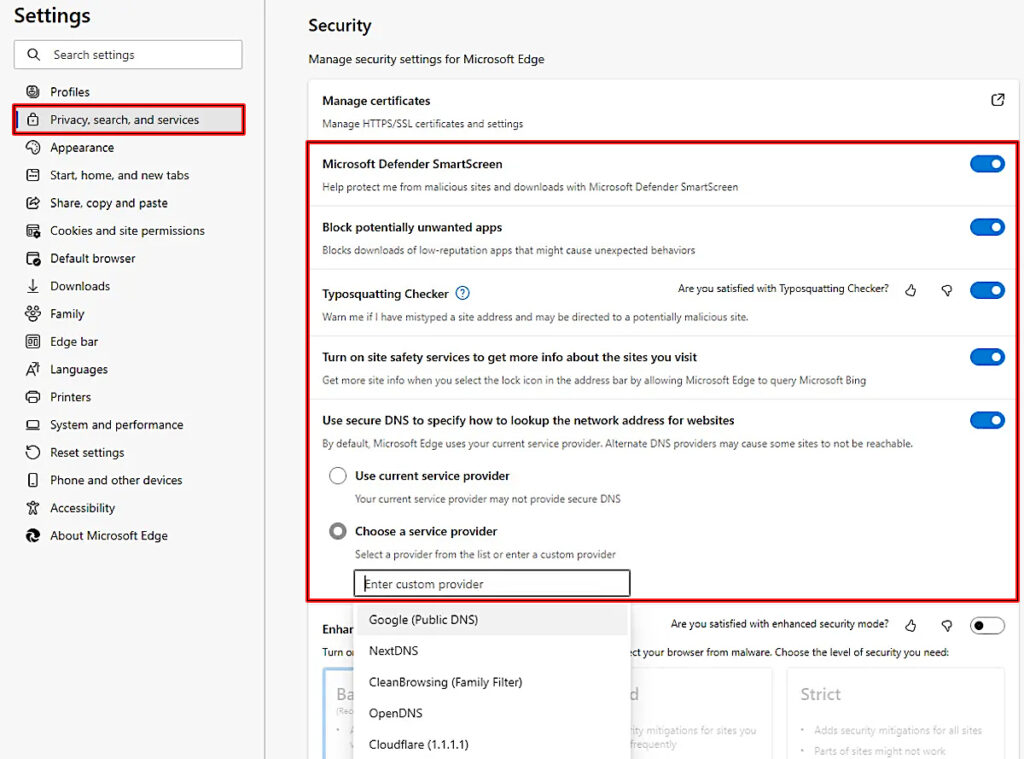
5. Use Secure DNS
The option for Use secure DNS to specify how to lookup the network address for websites is another one you should turn on.
Savvy cybercriminals can pull a stunt called DNS hijacking in which they use DNS queries to redirect your website requests to malicious sites.
To guard against this type of exploit, many DNS providers use a feature called Secure DNS. By default, Edge uses the DNS of your current organization or service provider, which may or may not use Secure DNS.
To protect yourself, turn on this option and click the setting for Choose a service provider. You can then choose a different DNS provider from the list, such as Google, NextDNS, or OpenDNS, all of which use Secure DNS.
6. Turn On Enhance Your Security On The Web
Edge provides an enhanced security mode to further protect you from malware and other threats. Turn on the switch for Enhance your security on the web, and you can choose from three different levels; Basic, Balanced, or Strict.
- Basic turns on security protection for sites less visited and will work with all websites
- Balanced enables security protection for sites not frequently visited and should work with most websites
- Strict turns on security protection for all websites but may cause conflicts with certain sites or parts of sites.
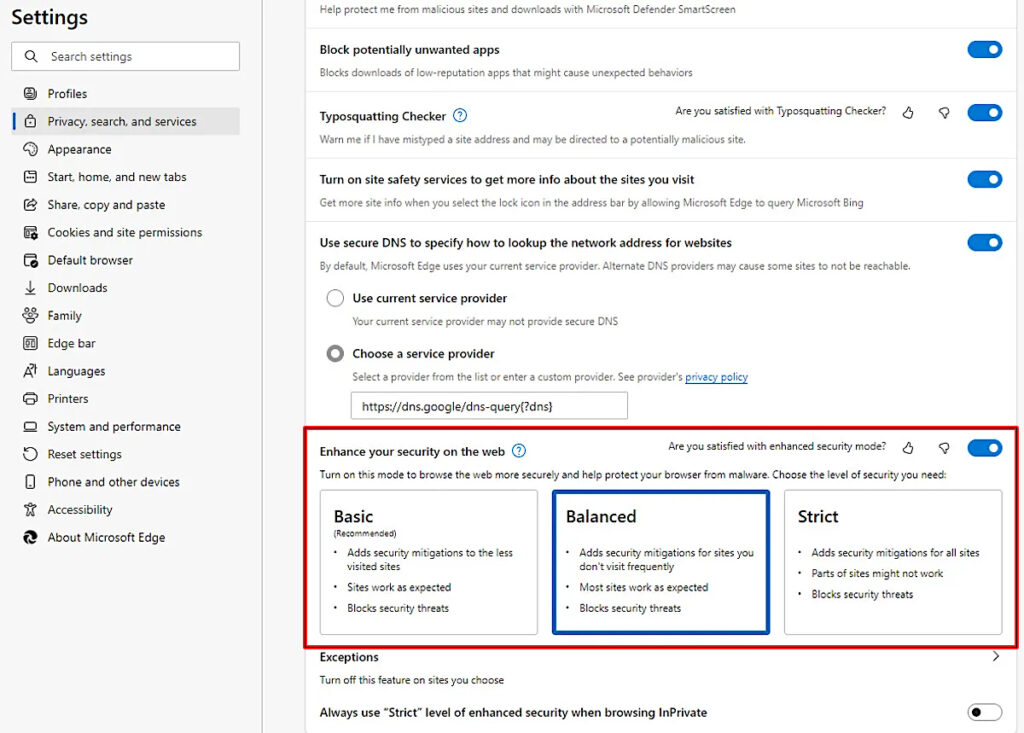
You may want to start with Balanced and see if the sites you visit still fully work. If you run into any obstacles, there are two actions you can take. Go down to the Basic level or add the website that’s not working properly as an exception by selecting the setting for Exceptions and adding its URL.
7. Turn On Always Use “Strict” Tracking Prevention When Browsing InPrivate
The final option under Security, is turn on the switch for Always use “Strict” tracking prevention when browsing InPrivate if you want the Strict level to take over when you open a website in an InPrivate window.
Beyond tweaking these security settings, there are actions you can take when browsing the web. Click the ellipsis icon at the top and select New InPrivate Window. This lets you open a site in InPrivate mode, which deletes your browsing information and history after you close the window, discards your download history, and stops searches in Microsoft Bing from being associated with you.
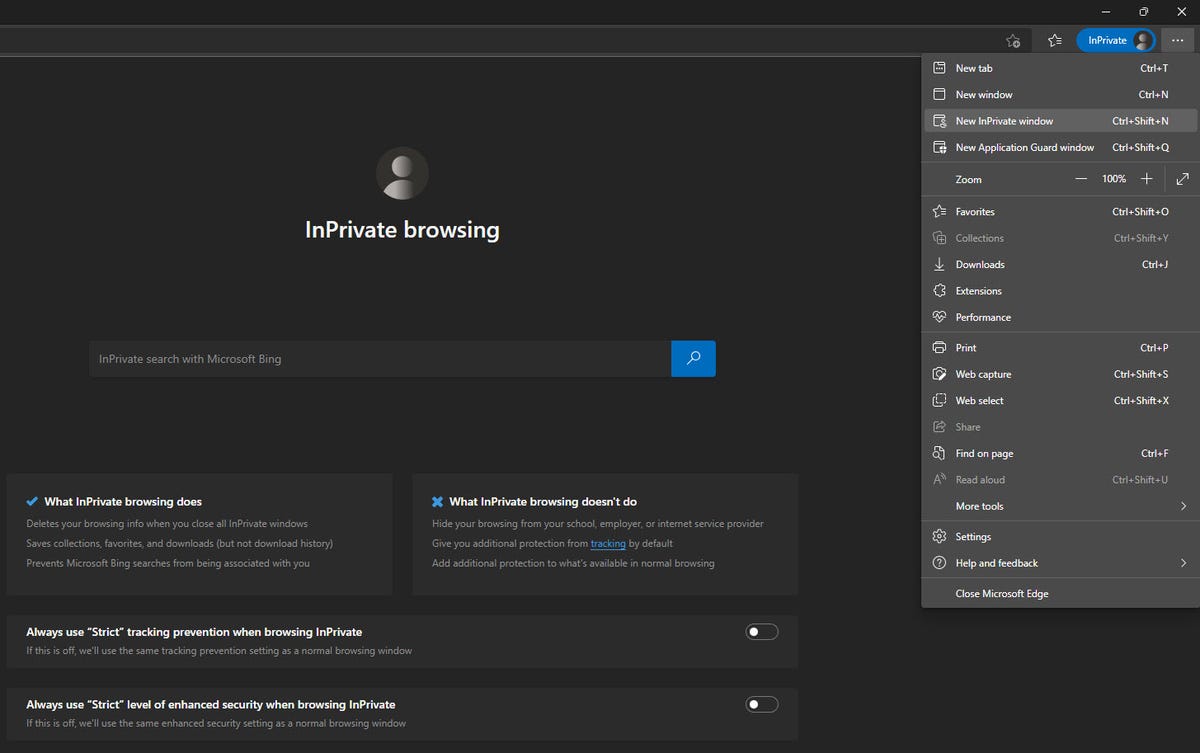
8. Select New Application Guard Window
Finally, click the ellipsis icon and select New Application Guard Window. Application Guard uses a hardware isolation tactic to launch websites insider a container.
This process protects your operating system and computer from any malware that may pop up in Edge. Unless you’re using Edge in a corporate or business environment, this is not an option you’d likely use very often. If you’re concerned about visiting a suspicious website, you may want to open it in this mode.